Create Appointment
Create an
Appointment
There are two different types of appointments you can create. One-Time Appointments take place only once, and you will not see it appear in the schedule again unless you go back to the date of the appointment. Recurring Appointments take place more than once (e.g., on a biweekly or monthly basis), and will continue appear in the schedule for as long as the appointment recurrence is set.
Aside from saving or deleting appointments, you can also Create a New Visit and Post a Copay from within the dialog window.
Create a New Appointment
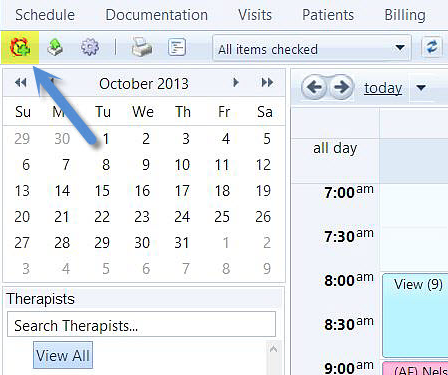
1) Click on the New Appointment ![]() icon. Alternatively, click a time slot on the schedule.
icon. Alternatively, click a time slot on the schedule.
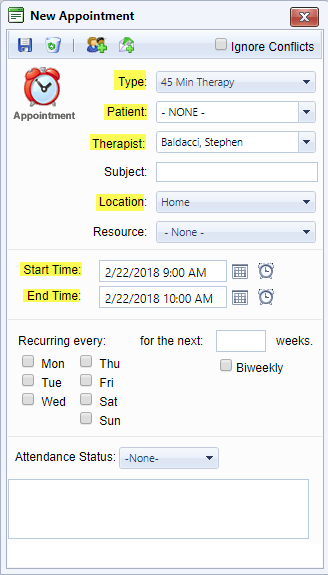
2) Once the Appointment Box appears, select an option from the Type, Patient, Therapist, and Location fields. Each option is selected from a dropdown menu, where you can define the different criteria of the appointment. Choose the Start Time and End Time for the appointment by selecting a date via the calendar button, and time of the day via the alarm clock button. This field will display the current computer time by default, so you will want to be sure to check that the Start and End time of the appointment are correctly inputed.
You can also type in the Subject of the appointment (which will appear on the face of the schedule), and select the Attendance Status of the patient. If desired, you can add any additional notes in the blank text box at the bottom of the dialog, underneath Attendance Status.
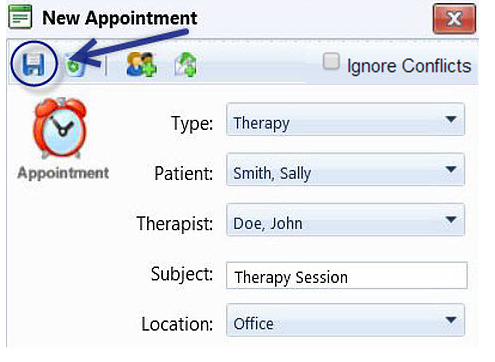
3) When you are finished, click the Save  button to save the appointment.

How to Create a Recurring Appointment
Follow these steps to create a new appointment:
1) Click on the New Appointment ![]() button or click a time on the schedule.
button or click a time on the schedule.

2) Once the Appointment Box appears, select an option from the Type, Patient, Therapist, and Location fields. Each option is selected from a dropdown menu, where you can define the different criteria of the appointment. Choose the Start Time and End Time for the appointment by selecting a date via the calendar button, and time of the day via the alarm clock button. This field will display the current computer time by default, so you will want to be sure to check that the Start and End time of the appointment are correctly inputed.
You can also type in the Subject of the appointment (which will appear on the face of the schedule), and select the Attendance Status of the patient. If desired, you can add any additional notes in the blank text box at the bottom of the dialog, underneath Attendance Status.
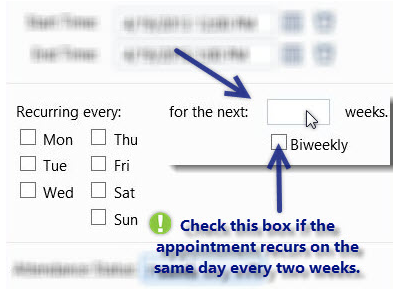
3) Under "Recurring Every:", check the necessary boxes to indicate how many days of the week the appointment is scheduled to recur (e.g., Monday, Wednesday, Friday).

4) In the box to the right on the same line, indicate the number of weeks to make the appointment recurring. To see the same patient on the same day every two weeks, check the box next to Biweekly. The maximum number of weeks a recurring appointment may be set for is 156.
5) When you are finished, click the Save button to save the appointment
Recurring appointments can be edited or deleted from the Appointment Box.
Created with the Personal Edition of HelpNDoc: Free iPhone documentation generator